

Mountain photography: How to capture the Milky Way

by Kevin Jason Manuel
Ever wanted to photograph the Milky Way? Well, you’re in luck–read on.
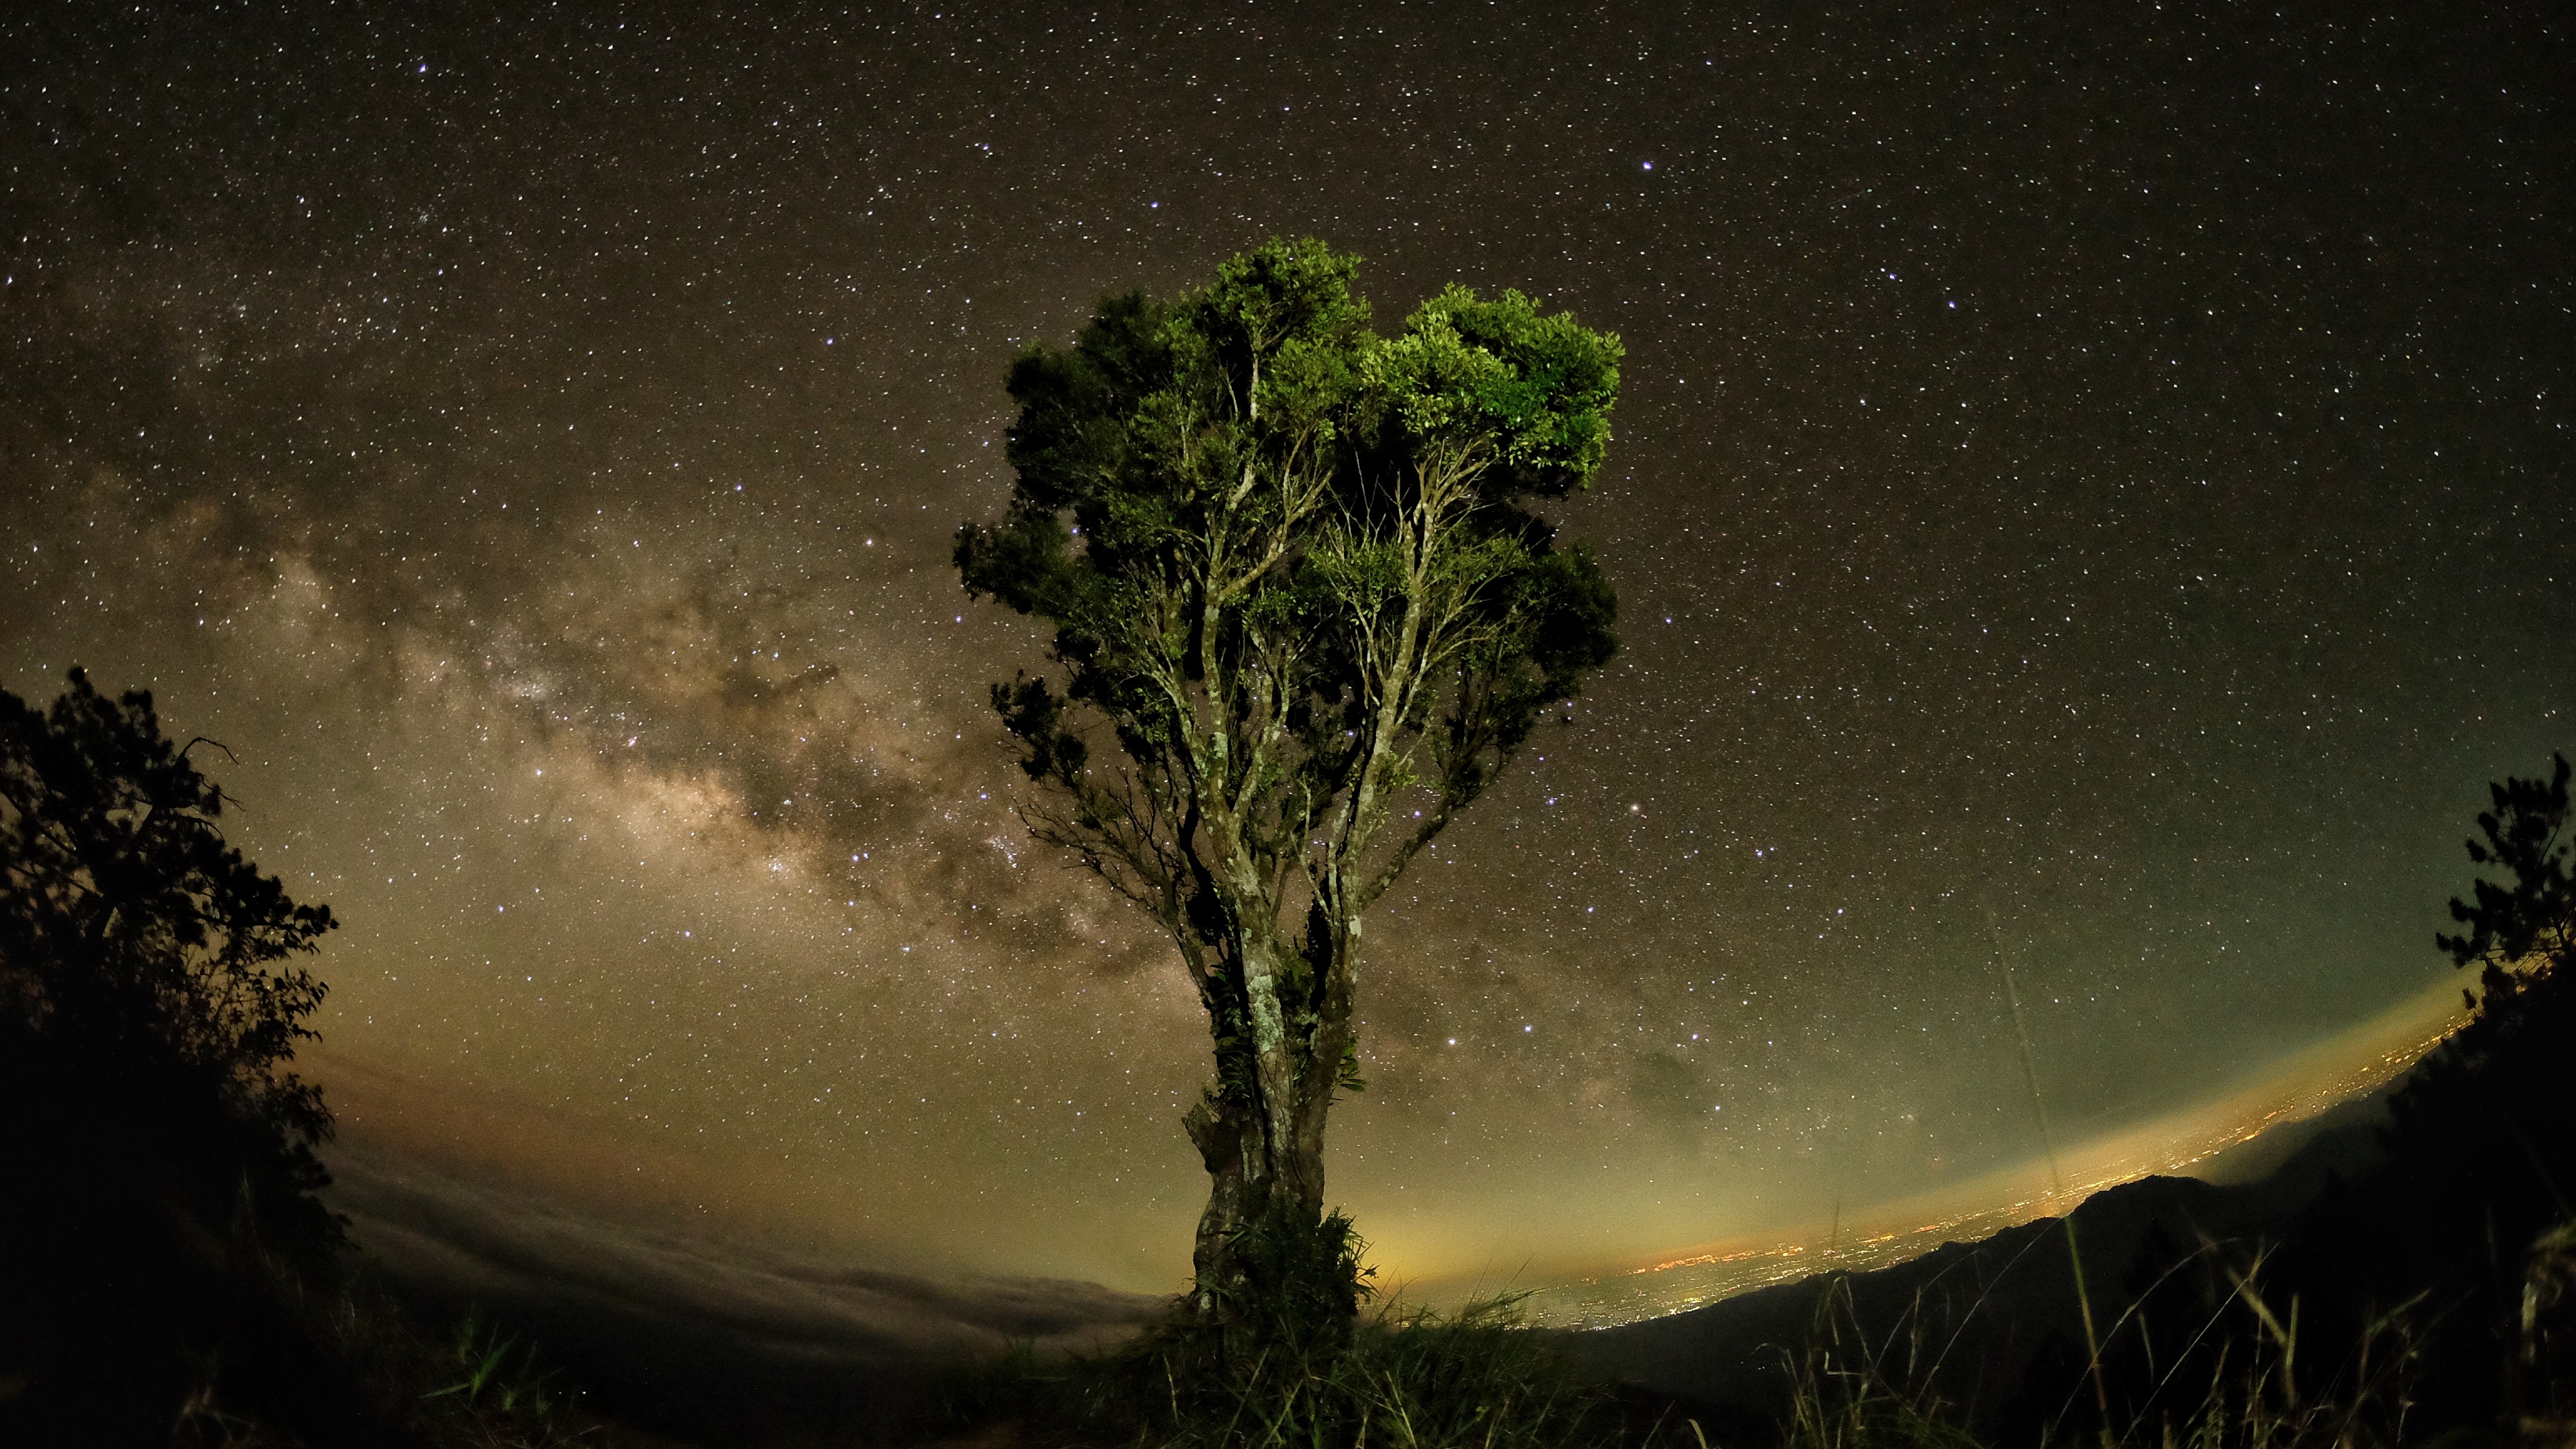
What is the Milky Way? Basically, it’s a dense band of stars that look very impressive in a photo. It comes and goes, rises and sets, and capturing it isn’t easy… but it’s definitely rewarding.
Things you’ll need:
1. A camera that can take long exposure photos–a DSLR, micro four-thirds, mirrorless, digicam, or even a cellphone.
Know your camera — there are many makes, models, and lenses. Do yourself a favor and learn how to use that expensive camera you bought. You’ll need a basic understanding of how your camera works, the various modes, and how to set the ISO, shutter speed, and aperture.
Lens — use your widest angle lens, if you’ve got one.
2. Tripod (or any stable thing you could place your camera on) — It takes anywhere from 10 to 30 seconds to capture the Milky Way. If your camera moves, even the tiniest bit, you’ll get a blurry shot.
3. Sky map / general knowledge of constellations —There are a lot of free apps on your phone that you could use to find out your chances of getting a good shot. Basically, you just need to keep track of the constellation Sagittarius to find the core of the Milky Way galaxy.
4. Luck and patience. Pray for clear skies and good weather. Comfort yourself in knowing that it takes a lot of attempts to get it right. Most probably, you will not get it right the first time.
Got everything you need? Ok, let’s start.
One thing i’ve learned from shooting the Milky Way is that it’s all about timing. It’s only visible at specific months and specific times. If the moon is present in the night sky, no matter how small, your chances of a successful shot will drop. That’s the reason it’s best to time your attempt during a new moon. Or since the moon rises, sails across the sky, and sets, check your sky map and see if there’s a window where the core would be present without the moon around.
Sometimes the Milky Way will be visible at 8 pm, sometimes at 1 am, or even 3 am. Check your sky map, set your alarm clock and pray that you get up.
And while you’re waiting for your camera to take the photo, brew some coffee. Make sure you’ve got a warm jacket–it’s usually freezing out there.
Settings:
Focus: set it to manual, and focus to infinity
Aperture: set it to the largest opening
Shutter speed: I generally go with 30 seconds, as i’m not that much of a pixel-peeper.
ISO: trial and error–the ISO is basically how much your camera will compensate for the lack of light. A higher iso means higher compensation, but leads to more visible noise or graining. Noise/grain can be defined as the speckles of varying brightness that stand out on a photograph. Too much noise isn’t really pleasant to look at as it ruins the swabe-ness.
So start with maybe iso3200 and start dialling down by increments until you get a nice result.
Set the image quality to the highest possible setting. If you’ve got the patience to tediously post-process, set it to RAW+JPEG.
White balance: completely up to you. I usually go with shade–not much of an issue as you can change how it looks in post-processing.
Framing: having some foreground is really nice. A tent illuminated from the inside, maybe a friend who can stay still, mountain ranges, or maybe a nice tree. Illuminate your foreground by briefly shining your headlamp on them. How brief is a matter of trial and error. And if you’re photographing a person, it’ll be better if they’re facing away from you since their faces turn out blurry most of the time.
Set a two-second delay. this is to avoid any blurring caused by you actually pressing the shutter button. Yep, it’s that tedious.
Well, that’s about it for the instructions. Click your shutter and watch the magic happen. Remember, shooting the Milky Way is all about trial and error. You may not get it right the first time. Make sure you have extra batteries and a spare memory card–long exposures eat away at your battery fast.

Leave a Reply
Be the First to Comment!